When I joined Nucleus Toys a month or so ago, I was intrigued by a category in their catalogue called
Co-Operative games. I was given an already opened set to bring home and explore...and I am hooked!! These are the perfect entry-level board games for little ones who often struggle with the pressure of competition, or the disappointment of losing a traditional board game.
So here is what it is all about:
The players in a co-operative board game play together against the board, using strategy, logic and problem-solving. Yes, they still take turns, but since they are all on the same team, players have to work together to achieve a common goal. If they win, they win as a team, and the same goes for losing.
Although there are many of these games available to players of all ages, most readers of this blog are parents of toddlers and pre-schoolers, so I will use an example of a game perfect for this age group!
MAX is a lovely game by a company called Family Pastimes (click on the link to visit their web site and see my note at the bootom of this post) and is available in South Africa through Nucleus Toys. (You can contact me for ordering information).
A fat old cat named Max finds his way out the door of his house. His owners have only so many treats to get him back inside, and Max is a quick treat-eater. Can you distract Max long enough for the woodland creatures to get safely home? Watch out-- Max is hungry!
The aim of the game is to help the chipmunk, bird and mouse to get home safely before Max catches them. This happens if Max lands on the same space as one of the little animals.
The game is played with a set of special dice, with only one dot on each side, either black or green. There are three possible results to each roll of the dice:
• Two black dots (this will let Max advance two spaces)
• Two green dots (This helps one small animal advance two spaces, or two of them can move one space each)
• One green and one black dot (this lets Max advance one space, and a small animal move one space)
Depending on the roll of the dice, the players have to consult with each other as to what the best strategy would be to keep the woodland animals out of harm's way. They have access to four treats which can be used once each during the game to lure Max back to his mat on the porch, and there are also short-cuts on the board - BUT...these can be used by the woodland animals and by Max, so players need to anticipate Max's next move!
The game helps children to understand the relationship between cats and other small animals (we try to help the small animals get to safety, but we also understand that Max is a natural hunter!), an encourages children to make meaningful decisions.
I found a lovely review of this game here, and the writer, Evelyn Saenz, gave the following suggestions for how the game of MAX can be used to teach children a variety of skills:
LANGUAGE ARTS: Oral communication
MATHS: One to one correspondance, counting, probability, and strategies
SOCIAL STUDIES: Cooperation, taking turns, caring for and taking responsibility for pets
SCIENCE: Natural Selection, backyard habitat, animal behaviour
ART: How about drawing Max and the other creatures?
MUSIC: Could you make up a song about Max?
GROSS MOTOR SKILLS: How about going outside and reenacting the game of Max? Be sure to scurry, scamper and flap your wings!!
MAX is suitable for ages 3/4 - 10, and 1 to 8 players can play at a time.
There are 18 co-operative games from Family Pastimes in the Nucleus Toys range. You can view the online catalgoue by clicking here.
Showing posts with label educational toys. Show all posts
Wednesday, June 2, 2010
Monday, May 17, 2010
Duo Puzzle
I love love love wooden toys...
for their feel and their look and their smell and their sound!
And one of my favourites at the moment is
DUO PUZZLE.
Here is how it works:
Pick a design from the pack of laminated designs cards, which are graded from Starter to Master.
Then use the bright & beautiful wooden puzzle pieces to first build the bottom layer....
and then finish it off with the top layer...
To help my little girl focus, I covered the second picture while we worked on the bottom layer.
More advanced little puzzle lovers have to work straight from the double layer picture!
And here's another idea for using this lovely game with younger toddlers:
Scan the design and then print onto an A4 page. Let your little one then arrange the puzzle pieces straight onto the design!
What a f u n way to help little eyes practice visual discrimination, colours and shapes!
This game belongs in your child's toy collection! You can order it from me by clicking here. Duo Puzzle is availible at R180, excl. postage, but if you live in the Durbanville area, stop in for a cup of tea and save on the postage!
Wednesday, May 12, 2010
A weighty matter
Don't you just
love
those moments when all of a sudden, right in the middle of an ordinary day, a teachable moment just sneaks up on you and
surprises
you with the joy and satisfaction that comes from learning?
Sweetpea and I were having our eleven o'clock cuppa tea at the kitchen counter and paging through a beautiful picture book with bright, cheery photographs of children going about their day. We chatted about a picture of children in chefs hats and aprons in a play kitchen, and Sweetpea named all the familiar kitchen objects. Then she pointed to a picture of a kitchen scale and I could see her little brain searching frantically for the word for that thing...but it hadn't been 'filed' yet, and I helped her out. "That's a scale," I said. "We use it to see how heavy things are." I realized this was a little abstract for her, so I fetched the kitchen scale to show her. It stands on the counter right next to the stove where she helps me cook everyday, but has obviously never made an impression before now.
We investigated the needle, and how it moves when we pressed the bowl down gently. Even though I haven't introduced her to number symbols yet, I spoke about the zero and the one and used terminology like grams and kilograms. She echoed everything I said and was truly absorbed in the whole thing. So I fetched a few things that were within arm's reach and we started weighing them. She was thrilled at how we could make the needle move a little further - or not so far - depending on the weight of the object.
Delighted!!
That's heavy!!
PS. It just occured to me that there's a lovely little balance scale in the Nucleus Toys range. Three actually! I like the middle one...think it should find a home here with us! Remember, you can order these from me via e-mail. Click here!
The deluxe model - R420 (scale only. Weights: R 185)
The one I want! R120
Geometric balance. R100. Definitely getting this one once she's older!
Monday, May 10, 2010
Teddy Bear emotions
I promised you a few posts on emotional intelligence, and want to start off with sharing with you about two games that has helped Sweetpea a great deal in the way of naming emotions.
They are called Bear Pairs and Rainbow Bears, and I bought these as part of my 'kit' when I became a consultant for Play2Learn educational Toys at the beginning of this year. They are made by Smile, so you know it is good quality and well thought through!
Anyway, like I said, they were intended to be part of my 'business' toys and not for my own children to play with. But as I very quickly realised, I simply cannot sell something to a mother if I don't know from personal experience that it is a good product, so I took it out one afternoon to see how Sweetpea would take to them. They have been a hit eversince (and not in the way you'd expect...as you soon will see!)
Bear Pairs is made up of 12 sets of bear shaped cards. We started playing the simplest game first: finding each bear's match! I laid the bears on the carpet and Sweetpea would search for the matches. (Great for visual discrimination AND midline crossing!) The next step is playing that classic memory game where all the bears face downwards and you turn over two at a time, trying to remember where the match is. (The bears are all cut from the same die, so the child can't guess by means of the shape.)
Rainbow Bears is intended as a game for teaching primary and secondary colours. Two of the bears have spinners on their bellies (primary colours and black and white, and secondary colours and black and white), so the children spin and then pick a 'button' in the matching colour to place on the corresponding dots on their bears' bellies. Both sets come with instructions for several variations of these games.
But what has this to do with my two-year old and her emotions? Well, you will notice that the bears from both sets show a beautiful range of facial expressions. When we first started playing with these, we spent a lot of time talking about each bear, its expression, its clothing etc, and made up stories about why they felt like that. The bandaged bear was an instant favourite with Sweetpea, probably because she could relate to having bumps and bruises!
It was shortly after I introduced this game when she one day told me she was feeling sad. I realised that she had never used that word until we first played with the bears, so I picked a few of them with expressions that I thought she could relate to, and kept them next to her bed. Whenever she experienced an intense emotion, I pointed it out to her by showing the corresponding bear and talking about it!
Words are such a powerful tool: imagine feeling something overwhelming - be it joy or anger or sadness or excitement - and not being able to communicate it to the people you share your life with. When we teach our children the appropriate names for their emotions, we empower them. We can then help them to cope with those emotions in a healthy , positive way.
I want to add here that I am also training my children not to 'wallow'. We do not tolerate whining, and try not to indulge dramatics (my daughter is a little prone to exaggerations - she does have half my genes, after all!) If a child bumps a head or stumbles, I try to resist running to their rescue immediately (unless it's justified. However, I am always amazed at how quick they recover when no one makes a tremendous fuss out of every little bump!). Instead, I want to teach them to deal with it, and then get on with life. Joy is encouraged around here, and although feelings of real, legitimate sadness, fear, anger etc, are recognised and allowed, we aim to teach our children to work through negative emotions quickly and efficiently, so that joy and peace can be restored as soon as possible!
If you think your child can benefit from the two games mentioned above , you can order them from me via e-mail.
They are called Bear Pairs and Rainbow Bears, and I bought these as part of my 'kit' when I became a consultant for Play2Learn educational Toys at the beginning of this year. They are made by Smile, so you know it is good quality and well thought through!
Anyway, like I said, they were intended to be part of my 'business' toys and not for my own children to play with. But as I very quickly realised, I simply cannot sell something to a mother if I don't know from personal experience that it is a good product, so I took it out one afternoon to see how Sweetpea would take to them. They have been a hit eversince (and not in the way you'd expect...as you soon will see!)
Bear Pairs is made up of 12 sets of bear shaped cards. We started playing the simplest game first: finding each bear's match! I laid the bears on the carpet and Sweetpea would search for the matches. (Great for visual discrimination AND midline crossing!) The next step is playing that classic memory game where all the bears face downwards and you turn over two at a time, trying to remember where the match is. (The bears are all cut from the same die, so the child can't guess by means of the shape.)
Just a sample of the bears from the Rainbow Bears game
But what has this to do with my two-year old and her emotions? Well, you will notice that the bears from both sets show a beautiful range of facial expressions. When we first started playing with these, we spent a lot of time talking about each bear, its expression, its clothing etc, and made up stories about why they felt like that. The bandaged bear was an instant favourite with Sweetpea, probably because she could relate to having bumps and bruises!
It was shortly after I introduced this game when she one day told me she was feeling sad. I realised that she had never used that word until we first played with the bears, so I picked a few of them with expressions that I thought she could relate to, and kept them next to her bed. Whenever she experienced an intense emotion, I pointed it out to her by showing the corresponding bear and talking about it!
Words are such a powerful tool: imagine feeling something overwhelming - be it joy or anger or sadness or excitement - and not being able to communicate it to the people you share your life with. When we teach our children the appropriate names for their emotions, we empower them. We can then help them to cope with those emotions in a healthy , positive way.
I want to add here that I am also training my children not to 'wallow'. We do not tolerate whining, and try not to indulge dramatics (my daughter is a little prone to exaggerations - she does have half my genes, after all!) If a child bumps a head or stumbles, I try to resist running to their rescue immediately (unless it's justified. However, I am always amazed at how quick they recover when no one makes a tremendous fuss out of every little bump!). Instead, I want to teach them to deal with it, and then get on with life. Joy is encouraged around here, and although feelings of real, legitimate sadness, fear, anger etc, are recognised and allowed, we aim to teach our children to work through negative emotions quickly and efficiently, so that joy and peace can be restored as soon as possible!
If you think your child can benefit from the two games mentioned above , you can order them from me via e-mail.
Labels:
Being a Parent,
educational toys,
toddler emotions
Sunday, April 18, 2010
Tangram in the kitchen
Last week I wrote about the fun we had playing around with our
TANGRAM
set over the long weekend.
(you can read that post by clicking here.)
I was researching something completely different today and came accross this great idea for getting the whole family to enjoy tangram everytime they head to the fridge for a snack!
Buy some self-stick magnets or magnetic tape from a craft shop, adhere it to the back of each tangram piece and stick them all on the fridge!
Put a magnet on a bull clip, too, and use this to hold on of the design cards.
You can swap the card around every day.
And for some competitive fun during the school holidays:
Let the younger children make a 'trophy' out of an empty, plastic cooldrink bottle,
fill it with treats,
and put a score card on the frigde next to your tangram magnets.
Whoever solved the most tangram puzzles by the end of the holidays,
get the trophy for
Tangram champion!
I got the idea for this here.
I was researching something completely different today and came accross this great idea for getting the whole family to enjoy tangram everytime they head to the fridge for a snack!
Buy some self-stick magnets or magnetic tape from a craft shop, adhere it to the back of each tangram piece and stick them all on the fridge!
Put a magnet on a bull clip, too, and use this to hold on of the design cards.
You can swap the card around every day.
And for some competitive fun during the school holidays:
Let the younger children make a 'trophy' out of an empty, plastic cooldrink bottle,
fill it with treats,
and put a score card on the frigde next to your tangram magnets.
Whoever solved the most tangram puzzles by the end of the holidays,
get the trophy for
Tangram champion!
I got the idea for this here.
Monday, April 12, 2010
Felt Board Shapes
Yes,
felt board fever
is still running high in this household, so I thought I'd share some more ideas about how to use the
SHAPES set
from the Suczezz range,
since that is such a favourite with moms who buy from me!
The first - and probably most obvious - activity is to let your child
identify a shape
and place it on the felt board. The set contains two of each shape - for this activity, set out only one of each to make it easier for a younger child. We like to sit on the carpet when we play with the felt board, and I lay out the pieces on a plastic tray in front of the board. - For the really little ones, put out only the very basic shapes, like a large circle, square and triangle.
- Once they know a few more shapes, put out the rest of the set.
- Make the game a little more interesting by saying "I Spy with my little eye...a large pink circle!" (only mention colours if your child can identify them easily.)
- This is a great way to introduce the concept of small and large, since the set contains most of the shapes in two sizes. Ask: "Can you place a large circle and a small square on the board?"
- And you can work on position and vocabulary by asking: "Place a small circle on top of the large one / next to the square / behind the rectangle / right at the bottom of the board."
The next time you take the felt pieces out, let your child
explore on his or her own.
It is a good idea to place the pieces with the black print lines facing down - I find that it is easier to see the creative possibilities that way! You can casually show your child how to put a few pieces together to make a 'picture', but be careful not to immediately build a house or other 'real' thing. I find that this inhibits my little girl - she cannot produce the same kinds of recognizable things yet, and then gives up.A friend of mine came over recently and her seven year old son, on seeing the felt board out, immediately set about building a very interesting 'robot' with the shapes. Sweetpea, on the other hand, just likes stacking the pieces on top of each other in little piles resembling multi-coloured club sandwiches!
Once your child knows the basic shapes, introduce the more difficult ones, like the parralellogram, wedge and semi-circle, by getting out
both sets
and playing a
matching game.
If you have the large green felt board from the Suczezz range, just stand it on its side so the fold down the centre divides your board into two. If you have another kind of board, cut a long, thin strip of felt as a dividing line. OK, back to the game: You place a shape on your side, your child places the match on her side! In our household, though, Sweetpea will probably be the one to start and I'll follow! If your son is playing with you, capitalize on his competitive nature and keep a score card with little gold stars!
Develop this game even further and use it to introduce your child to
SYMMETRY.
Continue along the vein of the matching game, but encourage your child to mirror your arrangement on his/her side of the board. When they grasp the concept of symmetry, build a butterfly together!And to think you can do
ALL THAT
with a
SINGLE SET
of
Tuesday, April 6, 2010
Felt Board Fun
I love felt boards! The whole idea just brings back so many pleasant childhood memories of Sunday school classes where we sat, mouths agape, as we watched the teacher smooth her hands over the beautiful pictures of Bible characters as she told us the stories. My mother eventually bought us our own felt board and books with press-out pictures that had little strips of felt on the back, and I spent hours telling myself the story of Jesus' birth while organizing the pictures just so! And isn't there just something almost 'organic' about handling pieces of felt?
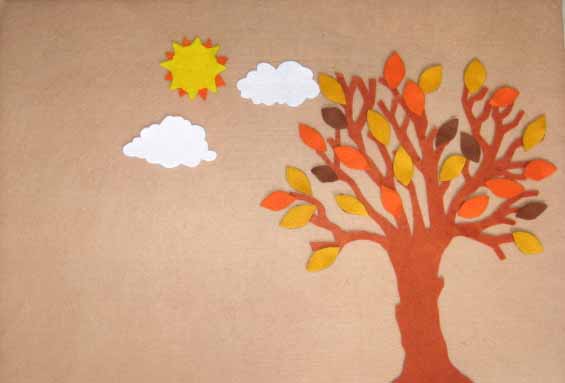
So, about a week ago I made a lovely, lightweight felt board for Sweetpea's room, using a piece of tan coloured felt I had sitting in my fabric cupboard for ages! I sell felt boards from the Suczezz range of educational toys, but I'm a bit of a pain about matching decor, and since theirs come in blue or green, it would clash with the creams and dusty pinks of her bedroom... Some of their felt board themes came in handy, though! As soon as the felt board was done, I gave Sweetpea the SHAPES pack to try out - it was an instant hit!About half of the shapes from the SHAPES theme pack, here on the green Suczezz felt board.
I was having way too much fun to quit then, so I visited http://www.makingfriends.com/ for some templates to make a boy and girl to play under the tree! My friend Georgia over at Love and Lollipops recently posted on this great website, where you can download free paper dolls, as well as clothes, hairstyles, and accessories for your dolls! I made a felt version in no time and will now be adding to the wardrobes so Sweetpea can dress her dolls according to the weather!
The tree in it's autumn outfit!
Monday, April 5, 2010
Tangram
There were outcries of frustration and the odd triumphant bellow emminating from our house this weekend as we faced the geometry giants that were hiding in our new Tangram game! Now, I LOVED high school...except for those geometry classes that had me break out in a cold sweat. Oh, had I but discovered tangrams when I was younger, it could have saved me hours of geometric grief!
Tangram is an ancient Chinese puzzle consisting of 7 shapes cut from a single square.
One must then organise these shapes to form pictures, the catch being that all seven shapes must be used for each picture, and no overlapping of shapes are allowed.
Working with tangrams develops a myriad of skills, including logic, visual discrmination and two-dimensional skills. For some very good ideas of how to play tangram games with your pre-school to grade eight child, click here.
Tangram is one of the games I have on special this month (If you are not yet receiving my monthly newsletter with special offers and news about new products and workshops, send me an e-mail.) So on Friday evening I thought I'd present it to the rest of the family in the hope that the children didn't inherit my geometry skills! (It's a wee bit soon to tell with ArrowBoy -he's still content just chewing the pieces) The dad struggled about just as much as I did initially, but then the lights came on and together we triumphed over quite a few of the puzzles. The star of the evening was Sweetpea.
Although she's obvioulsy way too young to be building the pictures yet, she immediately fitted together a square and a small triangle and proudly showed me the house she'd built. A little while later she announced: "Square" and showed me how she had used two of the large triangles to build a square. She then moved another square over and said; "big square, little square!" I was mightily impressed and think I'll leave the Tangram set out to encourage further exposure to shapes!
This set consits of two sets of tangram pieces and 80 puzzle cards with their solutions on the back. Game rules are included. By the way, one way to expose younger children to the wonders of tangram is to let them build the solutions first. At R55 (price for April 2010) this is a great birthday gift for chidren 6+ and any adult who loves brain teasers!
I found a lovely little story book about Tangrams, called Grandfather Tang's Story - A tale told in Tangrams - check it out by clicking here.
Tangram is an ancient Chinese puzzle consisting of 7 shapes cut from a single square.
One must then organise these shapes to form pictures, the catch being that all seven shapes must be used for each picture, and no overlapping of shapes are allowed.
Working with tangrams develops a myriad of skills, including logic, visual discrmination and two-dimensional skills. For some very good ideas of how to play tangram games with your pre-school to grade eight child, click here.
Tangram is one of the games I have on special this month (If you are not yet receiving my monthly newsletter with special offers and news about new products and workshops, send me an e-mail.) So on Friday evening I thought I'd present it to the rest of the family in the hope that the children didn't inherit my geometry skills! (It's a wee bit soon to tell with ArrowBoy -he's still content just chewing the pieces) The dad struggled about just as much as I did initially, but then the lights came on and together we triumphed over quite a few of the puzzles. The star of the evening was Sweetpea.
Although she's obvioulsy way too young to be building the pictures yet, she immediately fitted together a square and a small triangle and proudly showed me the house she'd built. A little while later she announced: "Square" and showed me how she had used two of the large triangles to build a square. She then moved another square over and said; "big square, little square!" I was mightily impressed and think I'll leave the Tangram set out to encourage further exposure to shapes!
This set consits of two sets of tangram pieces and 80 puzzle cards with their solutions on the back. Game rules are included. By the way, one way to expose younger children to the wonders of tangram is to let them build the solutions first. At R55 (price for April 2010) this is a great birthday gift for chidren 6+ and any adult who loves brain teasers!
I found a lovely little story book about Tangrams, called Grandfather Tang's Story - A tale told in Tangrams - check it out by clicking here.
Tuesday, March 30, 2010
Bridge to Learning review - Part Two
Joanne van der Merwe, occupational therapist, takes a look at another feature of Bridge to Learning, a set of educational games to promote school-readiness. If you would like to view the first part of this review, click on Bridge to Learning under LABELS in my sidebar. E-mail me for ordering information.
DESCRIPTION: The child is expected to follow the logi shape cards and position the coloured logi shapes to make the same design as that represented on the card (either directly on top of the card or on the table).
SKILLS that can potentially be developed :
• Fine motor skills (hand grasps)
• Position-In-Space
• Visual-spatial skills
• Visual form constancy (A shape is the same shape even if it is a different colour, size or orientation)
• Visual memory
• Visual-motor integration
• Tactile discrimination
• Planning/organisational skills
• Number / colour / shape concept
• Sequencing skills
• Creativity
SOME ALTERNATIVE IDEAS
• With younger children: The shapes can be used to develop colour concept by grouping different shapes of the same colour. Alternatively encourage your child to make groups of the same shape. Of course, they can also be counted which develops number concept.
• Younger children also love to press the shapes into play dough to make different shapes (good for developing the muscles of the hand and strengthening little wrists, especially if you get them to do this on a vertical/tilted surface). Using the shapes to cut play dough encourages the development of the finer hand grasps.
• If you place a piece of paper over a shape, you can do great crayon rubbings of the shapes.
• Roll the colour and/or shape dice (part of the package) and let your child find a shape of the same colour or shape as seen on the dice. Start with only the shape or only the colour dice and upgrade to using both dice at the same time
• You can also play a game whereby you and your child each roll the colour and shape dice and see who can complete the design on the logi shapes card first.
• Instead of copying the logi shape patterns on a horizontal surface, get your child to roll little balls of prestik (also great for developing finger movements for handwriting), and then sticking the logi shapes on a window/wall/sliding door to make the design represented on the card. This also develops wrist stability (important for hand skills). (I LOVE this idea - Joyful Mama.)
• Creativity can also be tapped into by encouraging your child to create his/her own designs with the shapes.
• Sequencing skills (important for numeracy and literacy) can be developed through creating a specific sequence of coloured shapes which your child needs to replicate or extend. I use the shapes to stimulate visual memory by making a sequence of shapes and then covering it and asking the child to copy the sequence either with the logi shapes themselves or by drawing the shapes.
• To develop visual-motor integration, get your child to draw the design on the logi shape card after building it with the shapes.
• Hide a few of the shapes in a sock or bag and get your child to try and guess what shape they are feeling (tactile discrimination)
GENERAL COMMENTS
The materials are very durable
Additional shapes and cards can be bought separately.
Logi shapes are a great investment as they can be used to develop a multitude of skills in a variety of different ways (the above list of alternative ideas is by no means exhaustive!)
This week Joanne came up with fabulous ideas about
LOGI SHAPES
DESCRIPTION: The child is expected to follow the logi shape cards and position the coloured logi shapes to make the same design as that represented on the card (either directly on top of the card or on the table).
SKILLS that can potentially be developed :
• Fine motor skills (hand grasps)
• Position-In-Space
• Visual-spatial skills
• Visual form constancy (A shape is the same shape even if it is a different colour, size or orientation)
• Visual memory
• Visual-motor integration
• Tactile discrimination
• Planning/organisational skills
• Number / colour / shape concept
• Sequencing skills
• Creativity
SOME ALTERNATIVE IDEAS
• With younger children: The shapes can be used to develop colour concept by grouping different shapes of the same colour. Alternatively encourage your child to make groups of the same shape. Of course, they can also be counted which develops number concept.
• Younger children also love to press the shapes into play dough to make different shapes (good for developing the muscles of the hand and strengthening little wrists, especially if you get them to do this on a vertical/tilted surface). Using the shapes to cut play dough encourages the development of the finer hand grasps.
• If you place a piece of paper over a shape, you can do great crayon rubbings of the shapes.
• Roll the colour and/or shape dice (part of the package) and let your child find a shape of the same colour or shape as seen on the dice. Start with only the shape or only the colour dice and upgrade to using both dice at the same time
• You can also play a game whereby you and your child each roll the colour and shape dice and see who can complete the design on the logi shapes card first.
• Instead of copying the logi shape patterns on a horizontal surface, get your child to roll little balls of prestik (also great for developing finger movements for handwriting), and then sticking the logi shapes on a window/wall/sliding door to make the design represented on the card. This also develops wrist stability (important for hand skills). (I LOVE this idea - Joyful Mama.)
• Creativity can also be tapped into by encouraging your child to create his/her own designs with the shapes.
• Sequencing skills (important for numeracy and literacy) can be developed through creating a specific sequence of coloured shapes which your child needs to replicate or extend. I use the shapes to stimulate visual memory by making a sequence of shapes and then covering it and asking the child to copy the sequence either with the logi shapes themselves or by drawing the shapes.
• To develop visual-motor integration, get your child to draw the design on the logi shape card after building it with the shapes.
• Hide a few of the shapes in a sock or bag and get your child to try and guess what shape they are feeling (tactile discrimination)
GENERAL COMMENTS
The materials are very durable
Additional shapes and cards can be bought separately.
Logi shapes are a great investment as they can be used to develop a multitude of skills in a variety of different ways (the above list of alternative ideas is by no means exhaustive!)
Saturday, March 27, 2010
Pre-writing exercises
There are some well-priced and yet educationally very valuable little items in the Smile catalogue, one of which is the Dinkie range of books. They sell at R25 each and there are eight books in the range, three of which are excellent for practicing pre-writing skills (scroll down to the bottom of the page for HOW TO ORDER and to see the other books in the range!):
1. Dinkie Dots - 32 fun-filled pages of dot-to-dot activities for children 4 yrs+
2. Dinkie Early Writing Fun - 48 basic writing patterns to prepare your child for formal handwriting, ages 4 to 6 (Take note that this book is included when you buy a Bridge to Learning set)
3. Dinkie Mazes - 32 exciting and challenging pencil puzzles for children 4 yrs +
I came up with a clever way to use these over and over after a quick visit to The Crazy Store earlier today! I bought an inexpensive 'certificate frame' which is basically a hardboard backing to which a sheet of glass is attatched with four metal clips. I enlarged an exercise page from Dinky Early Writing Exercises and slipped it under the glass. The child can now trace the patterns with a white board marker and wipe the glass clean when she's ready to try again! You can do the same with any of the other three Dinky books, too!
Don't take the little book apart to do the copying, though. Let your child practice on the glass, but when he has mastered the movements, let him complete them in the actual book - just imagine how frustrating it would be if you kept practicing something but never have something to show for all your hard work in the end!
The other books in the Dinkie range are:
* Dinkie crosswords - 27 exciting crossword activities for children 8 yrs+
* Dinkie Colour by Number for ages 6+
* Dinkie colour by Shape for ages 4+ (R25)
*Dinkie Crack a Jack 1 and 2 - crack the mathematical code and use it to plot a picture! Ages 7+

1. Dinkie Dots - 32 fun-filled pages of dot-to-dot activities for children 4 yrs+
2. Dinkie Early Writing Fun - 48 basic writing patterns to prepare your child for formal handwriting, ages 4 to 6 (Take note that this book is included when you buy a Bridge to Learning set)
3. Dinkie Mazes - 32 exciting and challenging pencil puzzles for children 4 yrs +
I came up with a clever way to use these over and over after a quick visit to The Crazy Store earlier today! I bought an inexpensive 'certificate frame' which is basically a hardboard backing to which a sheet of glass is attatched with four metal clips. I enlarged an exercise page from Dinky Early Writing Exercises and slipped it under the glass. The child can now trace the patterns with a white board marker and wipe the glass clean when she's ready to try again! You can do the same with any of the other three Dinky books, too!
Don't take the little book apart to do the copying, though. Let your child practice on the glass, but when he has mastered the movements, let him complete them in the actual book - just imagine how frustrating it would be if you kept practicing something but never have something to show for all your hard work in the end!
The other books in the Dinkie range are:
* Dinkie crosswords - 27 exciting crossword activities for children 8 yrs+
* Dinkie Colour by Number for ages 6+
* Dinkie colour by Shape for ages 4+ (R25)
*Dinkie Crack a Jack 1 and 2 - crack the mathematical code and use it to plot a picture! Ages 7+

How to Order:
E-mail your order to joyfulmama@telkomsa.net
I will then send you a confirmation and details about delivery etc.
Thursday, March 25, 2010
Visual Discrimination
As promised, a quick post on visual discrimination, as mentioned in the earlier post when I told you about the launch of Colour Code.
The shortest way to describe visual discrimination is to say that it is the ability to look and see the similarities and differences between things. This involves visual ananlysis (breaking something up into its parts) and visual synthesis (putting it back together again) and then coming to a conclusion about it.
This is an important requirement for reading. To illustrate this, have a look at the following pairs of letters:
c e
t f
b d
All of these letter pairs have simmilariteis in shape, and a child will only be able to distinguish between them if he/she has had ample opportunity to develop visual discrimination. Waiting for the child to be of reading age to practice and hone this skill, will be too late. Good pre-reading excercises would be to spot the differences in pictures!
A product which encourages visual discrimination through pictures, is Same Different. The game consists of four playing boards, each with a set of twelve matching picture cards, and a transparent control sheet. The simplest way of playing is to give the child a playing board and its picture cards, and have him place the correct card on top of the appropriate picture on the board. Mom or teacher can quickly check for accuracy by using the control sheet.
Or turn it into a team game: give each team a board and its cards. One player shields the board from her team mates and starting with the picture in the top left hand corner, asks them for the corresponding card by using descriptive language. The rest of the team has to listen very carefully and watch closely, as the differences on the cards are subtle. They are also not allowed to ask questions! When both teams have covered their boards in cards, Mom or teacher uses the control sheet to add up the score. The team with the most correct matches, wins!
Another game that practices vocabulary, listening skills and visual discrimination, is I SPY. Each team receives a playing board that contains a wealth of visual information through very detailed illustrations. A grid divides the board into 6 rectangles. Players spin the spinner and has to quickly find something on their board that starts with the letter on the spinner. The first team to spot such an item, places a card on top of the appropriate rectangle in the grid, and gets another go at spinning . The first team to cover their enitre board, wins!
Off course, Colour code (see previous post) is an excellent tool for practicing visual discrimination, from pre-school to 99!
The shortest way to describe visual discrimination is to say that it is the ability to look and see the similarities and differences between things. This involves visual ananlysis (breaking something up into its parts) and visual synthesis (putting it back together again) and then coming to a conclusion about it.
This is an important requirement for reading. To illustrate this, have a look at the following pairs of letters:
c e
t f
b d
All of these letter pairs have simmilariteis in shape, and a child will only be able to distinguish between them if he/she has had ample opportunity to develop visual discrimination. Waiting for the child to be of reading age to practice and hone this skill, will be too late. Good pre-reading excercises would be to spot the differences in pictures!
A product which encourages visual discrimination through pictures, is Same Different. The game consists of four playing boards, each with a set of twelve matching picture cards, and a transparent control sheet. The simplest way of playing is to give the child a playing board and its picture cards, and have him place the correct card on top of the appropriate picture on the board. Mom or teacher can quickly check for accuracy by using the control sheet.
Or turn it into a team game: give each team a board and its cards. One player shields the board from her team mates and starting with the picture in the top left hand corner, asks them for the corresponding card by using descriptive language. The rest of the team has to listen very carefully and watch closely, as the differences on the cards are subtle. They are also not allowed to ask questions! When both teams have covered their boards in cards, Mom or teacher uses the control sheet to add up the score. The team with the most correct matches, wins!
Another game that practices vocabulary, listening skills and visual discrimination, is I SPY. Each team receives a playing board that contains a wealth of visual information through very detailed illustrations. A grid divides the board into 6 rectangles. Players spin the spinner and has to quickly find something on their board that starts with the letter on the spinner. The first team to spot such an item, places a card on top of the appropriate rectangle in the grid, and gets another go at spinning . The first team to cover their enitre board, wins!
Off course, Colour code (see previous post) is an excellent tool for practicing visual discrimination, from pre-school to 99!
New Product Launch!
Two new products were launched into the Play2Learn range, about which I am just super excited! Both are still a bit advanced for my two sprouts, but I am quite willing to 'break it in' until Sweetpea and ArrowBoy are old enough.
The first is a perrenial favourite with educational and occupational therapists, and is called Color Code. (Years ago there was a Smile product called Line Up which was very similar, but had been discontinued). Color Code is great for logic thinking, spatial awareness and visual analysis and synthesis. (OK, I had to go look that last one up myself...And here is the short explanation: It is the ability to break a visually presented item into its component parts (analysis) and then to put the component parts together once again (synthesis)).
*As I was typing that just now, two other products came to mind which does the same.
I'll write a post about it when I'm done here and call it Visual Discrimination, so keep
a look out for that!*
It is also excelent for problem solving!
So here's how it works: You get a tile stand, a pattern booklet and perspex tiles with coloured shapes on them. You then have to copy the design in in the pattern booklet using your tiles. Easy? Yes, the ones in the strater section are quite straightforward, but keep in mind that the game is designed for ages 6 to 99 (So if you want to become 99 years old, buy this game!), so the problems become progressively more difficult.
The other new product in the Play2Learn line is called Zoob. This is a very intelligent construction toy, and what I like about it is that the things you build, can MOVE! At a consultants meeting we put together a man called Zoobdude and because of the way the pieces fit together, we had him walking, bending and even doing gymnastics on a bar built out of a string of other pieces. The particular set I'll be marketing is the Zoob75. They come in sets of 15, 20, 35, 55 and 60, but when you buy the 75-piece set, you get the instructions booklets for all the other sets as well.
And here is the really nifty part: There is great Zoob website at infinitoys.com One of its features is a Gallery with pictures sent in by children from all over the world. Click on KIDS, choose the Zoob 75 Kids Galley and see all the amazing things children are doing with Zoob. And THEN......
The first is a perrenial favourite with educational and occupational therapists, and is called Color Code. (Years ago there was a Smile product called Line Up which was very similar, but had been discontinued). Color Code is great for logic thinking, spatial awareness and visual analysis and synthesis. (OK, I had to go look that last one up myself...And here is the short explanation: It is the ability to break a visually presented item into its component parts (analysis) and then to put the component parts together once again (synthesis)).
*As I was typing that just now, two other products came to mind which does the same.
I'll write a post about it when I'm done here and call it Visual Discrimination, so keep
a look out for that!*
It is also excelent for problem solving!
So here's how it works: You get a tile stand, a pattern booklet and perspex tiles with coloured shapes on them. You then have to copy the design in in the pattern booklet using your tiles. Easy? Yes, the ones in the strater section are quite straightforward, but keep in mind that the game is designed for ages 6 to 99 (So if you want to become 99 years old, buy this game!), so the problems become progressively more difficult.
The other new product in the Play2Learn line is called Zoob. This is a very intelligent construction toy, and what I like about it is that the things you build, can MOVE! At a consultants meeting we put together a man called Zoobdude and because of the way the pieces fit together, we had him walking, bending and even doing gymnastics on a bar built out of a string of other pieces. The particular set I'll be marketing is the Zoob75. They come in sets of 15, 20, 35, 55 and 60, but when you buy the 75-piece set, you get the instructions booklets for all the other sets as well.
Zoob giraffe
And here is the really nifty part: There is great Zoob website at infinitoys.com One of its features is a Gallery with pictures sent in by children from all over the world. Click on KIDS, choose the Zoob 75 Kids Galley and see all the amazing things children are doing with Zoob. And THEN......
STAND A CHANCE TO WIN A ZOOB 75!!
Until the end of April 2010, you can win a set Zoob 75. Here's how:
1. Place an order with me for Zoob 75 between now and 30 April 2010.
2. Built something exciting with your set.
3. Send in your picture for publication on the infinitoys website
4. If your picture is accepted, you are entered into a draw to win...Another brand new, super cool set of Zoob 75!
5. ALL entrants whose photos are featured on the website receive 10% discount on the next set of Zoob 75 they purchase before the end of May 2010.
Only one entry per household.
Tuesday, March 16, 2010
Review: Bridge to Learning (Part 1)
I am thrilled to be publishing the first product review on this blog!
About the reviewer:
Joanne van der Merwe [BScOccTher (UCT) and MOccTher (Stellenbosch University)]
E-mail: mj3@telkomsa.net
Cell: 072 218 3667
Joanne is an occupational therapist and mother of two precious girls. I met her at one of my recent exhibitions and since she waxed lyrical about Bridge to Learning, I asked her if she would be so kind as to contribute a review on it. She agreed and a while later I received an e-mail from her, asking if it's OK if she does it in three parts, because, in her own words: "There is so much I want to share about the product that I fear the review will turn into a 500 word essay!" Thanks, Joanne!!
MANUFACTURER : SMILE
AGE GROUP: SMILE recommends 5+ years (but there are uses for even younger children)
CONTENTS
Bridge To Learning contains :
• Pegboard with coloured pegs and pegboard cards
• Logi shapes (different shapes in a variety of colours) and logi cards
• 1 colour dice and 1 shape dice
• Laces
• Touch and count cubes
Dinkie Early Writing fun book
Description : The child is expected to follow the pegboard cards and place coloured pegs into the pegboard to make the same design as that represented on the card.
Skills that can potentially be developed
• Fine motor skills (hand grasps)
• Position-In-Space
• Visual-spatial skills
• Eye-hand coordination
• Planning/organisational skills
• Number and colour concept
• Left-Right discrimination
• Sequencing skills
• Creativity
Some alternative ideas
• With younger children (under supervision of an adult to avoid choking on small parts): The pegs can be used to develop colour concept by matching the same coloured pegs. Picking up the pegs between the thumb and index/middle fingers develops the grasps needed for pencil manipulation. If the child struggles to place the pegs into the pegboard, let him/her drop them in an ice tray or egg box. Let them place pegs of the same colour in the different compartments (colour concept). Let them place 1 peg in each, then 2 pegs in each etc to develop number concept.
• Roll the colour dice (part of the package) and let your child find the same colour peg and place it in the pegboard as another idea for developing colour concept. You can also play a game whereby you and your child each choose a colour and see who can get a certain number of pegs in their pegboard first. If you choose ‘red’, you must roll a red on the dice in order to place a peg in your row.
• Creativity can also be tapped into by encouraging your child to create his/her own designs with the pegs.
• Sequencing skills (important for numeracy and literacy) can be developed through creating a specific sequence of coloured pegs which your child needs to replicate or extend.
• To develop position-in-space and left-right discrimination, give your child specific instructions to follow e.g “Place a red peg in one of the top holes, a blue peg underneath it, a green peg in the bottom right corner” etc
• Uses the laces (provided in the package) to thread through the holes of the pegboard.
• Put some playdoh (rolled flat) under the pegboard and then get your child to copy the design on the pegboard. Pushing the pegs into the playdoh will help to strengthen little fingers. Once you lift the pegboard up, the pattern made by the pegs can be seen in the playdoh. Younger children can even just push the pegs directly into the playdoh
GENERAL COMMENTS
The materials are very durable (I’ve had my pegboard for many years!).
Additional pegs can be bought separately.
Take precautions with younger children to prevent choking on small parts.
I love pegboards and use it all the time in therapy as there are so many different things you can do with the activity. It is a ‘must have’ in any home.
-------------------------------------------------------------------------------------------------------------
PS: Just to add a footnote to Joanne's great review: The pattern cards for the peg board has a column on the right which tells you WHAT the exercise is about, the SKILLS the child will master by doing it, and then it has some very good QUESTIONS for LANGUAGE DEVELOPMENT. The crad for the flower design featured above, reads as follows:
Basic Shapes: Circles
Skills:
1. Recognizing and naming circles.
Tracing circles.
Language Development:
1. How many flowers are there?
2. If you take one of the flowers away, how many flowers will you have left on your pegboard?
3. Where is the stem of the flower?
4. Point to the leaf.
5.What colour is the leaf and the stem?
6. What is the shape of the flowers?
To order your child's Bridge To Learning, please e-mail me at joyfulmama@telkomsa.net
About the reviewer:
Joanne van der Merwe [BScOccTher (UCT) and MOccTher (Stellenbosch University)]
E-mail: mj3@telkomsa.net
Cell: 072 218 3667
Joanne is an occupational therapist and mother of two precious girls. I met her at one of my recent exhibitions and since she waxed lyrical about Bridge to Learning, I asked her if she would be so kind as to contribute a review on it. She agreed and a while later I received an e-mail from her, asking if it's OK if she does it in three parts, because, in her own words: "There is so much I want to share about the product that I fear the review will turn into a 500 word essay!" Thanks, Joanne!!
PRODUCT:
BRIDGE TO LEARNING
(Part One: Peg board)
Price: R175
(Part One: Peg board)
Price: R175
MANUFACTURER : SMILE
AGE GROUP: SMILE recommends 5+ years (but there are uses for even younger children)
CONTENTS
Bridge To Learning contains :
• Pegboard with coloured pegs and pegboard cards
• Logi shapes (different shapes in a variety of colours) and logi cards
• 1 colour dice and 1 shape dice
• Laces
• Touch and count cubes
Dinkie Early Writing fun book
Description : The child is expected to follow the pegboard cards and place coloured pegs into the pegboard to make the same design as that represented on the card.
Skills that can potentially be developed
• Fine motor skills (hand grasps)
• Position-In-Space
• Visual-spatial skills
• Eye-hand coordination
• Planning/organisational skills
• Number and colour concept
• Left-Right discrimination
• Sequencing skills
• Creativity
Some alternative ideas
• With younger children (under supervision of an adult to avoid choking on small parts): The pegs can be used to develop colour concept by matching the same coloured pegs. Picking up the pegs between the thumb and index/middle fingers develops the grasps needed for pencil manipulation. If the child struggles to place the pegs into the pegboard, let him/her drop them in an ice tray or egg box. Let them place pegs of the same colour in the different compartments (colour concept). Let them place 1 peg in each, then 2 pegs in each etc to develop number concept.
• Roll the colour dice (part of the package) and let your child find the same colour peg and place it in the pegboard as another idea for developing colour concept. You can also play a game whereby you and your child each choose a colour and see who can get a certain number of pegs in their pegboard first. If you choose ‘red’, you must roll a red on the dice in order to place a peg in your row.
• Creativity can also be tapped into by encouraging your child to create his/her own designs with the pegs.
• Sequencing skills (important for numeracy and literacy) can be developed through creating a specific sequence of coloured pegs which your child needs to replicate or extend.
• To develop position-in-space and left-right discrimination, give your child specific instructions to follow e.g “Place a red peg in one of the top holes, a blue peg underneath it, a green peg in the bottom right corner” etc
• Uses the laces (provided in the package) to thread through the holes of the pegboard.
• Put some playdoh (rolled flat) under the pegboard and then get your child to copy the design on the pegboard. Pushing the pegs into the playdoh will help to strengthen little fingers. Once you lift the pegboard up, the pattern made by the pegs can be seen in the playdoh. Younger children can even just push the pegs directly into the playdoh
GENERAL COMMENTS
The materials are very durable (I’ve had my pegboard for many years!).
Additional pegs can be bought separately.
Take precautions with younger children to prevent choking on small parts.
I love pegboards and use it all the time in therapy as there are so many different things you can do with the activity. It is a ‘must have’ in any home.
-------------------------------------------------------------------------------------------------------------
PS: Just to add a footnote to Joanne's great review: The pattern cards for the peg board has a column on the right which tells you WHAT the exercise is about, the SKILLS the child will master by doing it, and then it has some very good QUESTIONS for LANGUAGE DEVELOPMENT. The crad for the flower design featured above, reads as follows:
Basic Shapes: Circles
Skills:
1. Recognizing and naming circles.
Tracing circles.
Language Development:
1. How many flowers are there?
2. If you take one of the flowers away, how many flowers will you have left on your pegboard?
3. Where is the stem of the flower?
4. Point to the leaf.
5.What colour is the leaf and the stem?
6. What is the shape of the flowers?
To order your child's Bridge To Learning, please e-mail me at joyfulmama@telkomsa.net
Subscribe to:
Posts (Atom)