Showing posts with label felt play. Show all posts

Wednesday, August 31, 2011

Felt laptop

When I first saw this super-cute idea on Pinterest, I just knew the Little Joyfuls would love it! You can find the tutorial here to make one of your own. I adapted mine a little in terms of colours (using what I had on hand) and by slipping in a thin piece of cardboard between the layers of felt to make it slightly more sturdy. The letters are rub-ons I found in the craft section at our Crazy Store.


The children saw me making this and Sweetpea is very excited about it, but it's actually part of a stash of little treats I am working on for when baby comes. I've cleared a small shelf in my closet where I am collecting handmade toys and homemade activity packs I can pull out as needed in case things get a little busy during those first few weeks.  More about this in a future post!

Tuesday, April 5, 2011

Our new 'neighbour'

   Remember the pretty little juice box village I made for Sweetpea last year?


   Well, I've been having a hard time throwing away empty juice boxes ever since, so I was delighted when I stumbled upon instructions for making a felt covered version. The original was a gingerbread house, but since Sweetpea is not familiar with the story of Hansel and Gretel yet (we are avoiding stories with witches for now), ours is just a fun hearts and flowers version!


   I made the doll as a cake topper for Sweetpea's third birthday cake, and just refashioned her a bit into a cheery little juice box home owner with a brood of pet baby chicks!!


   The felt elements of the house are not glued down, so Sweetpea can decorate it afresh every time she plays with it - today the windows are at the side of the house, as is the bird house, but who knows where they will be placed next time. And right now the flowers are growing beside the foot path, but tomorrow they may be festooning the sides of the roof. How fun!


I am linking this up to


and

Saturday, April 2, 2011

A 'FELT good' weekend!

    I just love all this creative energy that starts to course through my veins every time I enter my second trimester of pregnancy! And since the season is definitely changing to cooler, I have been itching to get my hands on some lovely, woolly felt. So, I spent this blissful Saturday afternoon creating all kinds of felty goodie goodness!!

   I first made a fun felt flower that turned a plain striped beanie into a stylish little hat for the colder weather up ahead...

  
   And then I tried my hand at felting a bar of soap and now I am hooked and cannot wait for the shops to open Monday morning so that I can go buy delicious smelling soaps in all shapes and sizes to turn into pretty-pretties for bath time bliss!! When you felt soap like this, you don't need to use a wash cloth - just wash with your gently exfoliating, felt-covered soap! My husband is off to Botswana on a mission outreach at the end of the month and has already asked for one of these to take along for showering with while up there.I strongly doubt his aesthetic appreciation of the whole business, but he obviously knows a good, practical solution when he sees one!


   I am right in the middle of sewing up a storm to get the Joyful Little Ones all covered up for winter. I had just finished a top for Sweetpea this morning that is light pink with playful little dalmations all over, so I thought a felt hair clip with a sweet little pup on one end would look lovely with it. What do you think?


Sunday, October 10, 2010

Creation bean bags

      We have been doing a lot of fun activities around the Creation Story lately and to make it more concrete and visual, I made up a set of six Creation Bean Bags that we have been using in many exciting ways!


   To make the pouches, I cut strips of blue felt a little wider than our bean bags, and sewed the sides closed, leaving a little flap at the back, to which I sewed a plastic press-stud. The pictures were glued down with fabric glue and left to dry under a stack of heavy phone directories overnight.


    I used some of the heavy duty bean bags that I sell. They are made from sturdy bull denim, and filled with PVC pellets instead of real beans. This means they can be washed in a normal washing machine (a great benefit if you have children like mine who seem to learn about their world primarily through their sense of taste!!). Also, beans and lentils can get moldy - no such problem with the plastic pellets!


   So I just slip the bean bags into their felt pouches for the duration of our Creation 'theme', and can then put them away until later ( I will store them with our felt board themes - you can click here to see how I keep our felt themes together in a tidy, 'compact' way!)

Here are close-ups of the bean bags for each day:

(CANNOT. GET. PHOTOS. TO. UPLOAD. CORRECTLY. 
 I appologise for the pictures that are on their sides. I have tried and tried to get them right side up, but to no avail.)


GAME IDEAS:

1. We played a silly bean bag toss game while we listened to the song God made the Universe from our The Singing Bible CD - more about this in another post later this week.

2. Make a masking tape grid with six squares on the living room floor. Place paper plates that are numbered 1 to 6 in each square. Place the bean bags in a line at your child's feet. As you call out the number of the day, she must pick the correct square and toss the bag onto the plate in that square!

3. On the first morning that we used these, I presented them in a 'lesson' similar to the Montessori Godly Play style. Click here for a video that shows how to go about this.

*Please note: you could also make a seventh bag with nothing on it to show that God rested on the seventh day. I only had six bean bags, so whenever we spoke about the seventh day, we would stretch out dramatically and say: "On day Seven, God rested in Heaven!" *


I also linked this post to Se7en's Friday Link Up and


Thursday, August 12, 2010

Parts-of-a-fish puzzle

As part of our fish theme this week, I made this fish felt puzzle for Sweetpea, based on the Montessori puzzles that teaches animal parts.


To make my own version, I covered a piece of cardboard (left over from the box my vacuum cleaner came in) with blue felt, using fabric glue. I then drew on the design with a black permanent marker.


I cut the parts of the fish from orange and red felt, and glued an A5-size manilla envelope to the back of the puzzle board to store the parts in.


The letters are from the Suczezz range of educational toys that I sell (the alphabet theme is R44. E-mail me if you would like to order some!) I have decided to start including letters more in our play. No pressure for Sweetpea to formally learn them, I just keep putting them out there and spelling things as we go along. She seems to learn best in this by-the-way manner: instead of sitting her down and teaching at her, I point things out in a casual way and she often surprises me with the things she picks up through observation.


We build this puzzle before we start any of our other fish themed activities every morning. The first time I showed her all the parts and where they go, and also named them for her. She then built it on her own, and I again repeated the correct name of each part as she did.


I leave the puzzle out for her in case she wants to return to it later in the day. Just this afternoon she sat building it at the kitchen counter, and I was impressed to see that she had also built the word fish, all on her own! (We are a bilingual family and I teach in my native Afrikaans, while my husband, an Australian, communicates only in English. PS: I showed Sweetpea the correct place for the dot on the 'i', but she insisted on keeping it right on top of the long part. Will be pointing out 'i's when we read our bedtime story tonight.)

Tuesday, May 18, 2010

Little Red Hen Felt Board Fun

Look what I've been up to this past weekend!


In preparation for the Fun on the Farm workshop this coming Saturday, May 22, I made a felt board version of the classic story of The Little Red Hen!

I only glued the 'shoulder' part of the Hen's wing down, so that I can slip props like the sheaf of wheat, hoe or bread under her wing for her to 'hold'!

I've been experimenting with ways to draw the detail onto my felt pieces. (I'm working on a Three Bears set for which I actually embroidered the lines with backstitch - WAY too much work!) My permanent marker's line's were too thick, the ink from the Pilot Fineliner bled, but...a good old black ballpoint pen was just right!!

(you can see the ink 'bleeding' on her toes!)
All the ladies attending the workshop receives a set of four beautifully illustrated puzzles featuring farm animals, as well as everything you need to make your OWN Little Red Hen felt board set!

The Puzzle set!
The workshop consists of ideas for using the farm puzzle set as a starting point for FOUR WEEKS' WORTH OF ACTIVITIES to share with your toddler, and includes crafts, matching games, fun ideas for lunch time, field trips, rhymes and songs, a Bible lesson / craft and of course, some Felt Board Fun!
Contact me to book your place!

Tuesday, April 27, 2010

Storing your felt stories

When I found a felt board doll stuck to the baby's bottom the other day, and a few felt leaves from our seasons tree stored away in his cheeks, I knew I had to come up with a
storage solution
for our felt pieces - and fast!!  It's super easy and super effective:

1.Use a large self-sealing
Plastic Bag.
2. Slip in a sheet  of plain
paper.
3. Use a permanent marker to write the
THEME
of your felt set on the write-on strip on the bag.
4. Punch holes
through the side of the baggie.
5. Slip in your felt pieces,
seal,
file
et Voila!!
You're a super-organized mommy in 10 minutes flat!

Monday, April 12, 2010

Felt Board Shapes

Yes,
felt board fever
 is still running high in this household, so I thought I'd share some more ideas about how to use the 
SHAPES set
from the Suczezz range,
since that is such a favourite with moms who buy from me!

The first - and probably most obvious - activity is to let your child
identify a shape
and place it on the felt board. The set contains two of each shape - for this activity, set out only one of each to make it easier for a younger child. We like to sit on the carpet when we play with the felt board, and I lay out the pieces on a plastic tray in front of the board.

  • For the really little ones, put out only the very basic shapes, like a large circle, square and triangle.
  • Once they know a few more shapes, put out the rest of the set.
  • Make the game a little more interesting by saying "I Spy with my little eye...a large pink circle!" (only mention colours if your child can identify them easily.)
  • This is a great way to introduce the concept of small and large, since the set contains most of the shapes in two sizes. Ask: "Can you place a large circle and a small square on the board?"
  • And you can work on position and vocabulary by asking: "Place a small circle on top of the large one / next to the square / behind the rectangle / right at the bottom of the board."


The next time you take the felt pieces out, let your child
explore on his or her own.
It is a good idea to place the pieces with the black print lines facing down - I find that it is easier to see the creative possibilities that way! You can casually show your child how to put a few pieces together to make a 'picture', but be careful not to immediately build a house or other 'real' thing. I find that this inhibits my little girl - she cannot produce the same kinds of recognizable things yet, and then gives up.

A friend of mine came over recently and her seven year old son, on seeing the felt board out, immediately set about building a very interesting 'robot' with the shapes. Sweetpea, on the other hand, just likes stacking the pieces on top of each other in little piles resembling multi-coloured club sandwiches!


Once your child knows the basic shapes, introduce the more difficult ones, like the parralellogram, wedge and semi-circle, by getting out
both sets
and playing a
matching game.
If you have the large green felt board from the Suczezz range, just stand it on its side so the fold down the centre divides your board into two. If you have another kind of board, cut a long, thin strip of felt as a dividing line.
OK, back to the game: You place a shape on your side, your child places the match on her side! In our household, though, Sweetpea will probably be the one to start and I'll follow! If your son is playing with you, capitalize on his competitive nature and keep a score card with little gold stars!

Develop this game even further and use it to introduce your child to
SYMMETRY.
Continue along the vein of the matching game, but encourage your child to mirror your arrangement on his/her side of the board. When they grasp the concept of symmetry, build a butterfly together!

And to think you can do
ALL THAT
with a
SINGLE SET
of
FELT BOARD SHAPES
that you can order from me for a mere
R44!

To place your order, please e-mail me.

Tuesday, April 6, 2010

Favourite Eric Carle books... and a felt board theme to match!

Before Sweetpea's birth I bought her two beautiful board books by renowned American children's book writer and illutrator, Eric Carle They are My very first book of shapes and My very first book of colours. The pages are split into two, with the top pages showing either the silhouette of a shape, or a block of
colour, to match to the pictures on the bottom set of pages.

We have read and read and re-read these two little books, and now ArrowBoy are starting to enjoy them, too!  You can click on the links below these pictures to order the books from Kalahari.net!

                                                            My very first book of colors

                                                            My very first book of shapes

The next Carle-addition to our bookshelf was The Very Hungry Caterpillar, one of the most popular of all his books (he has sold over 88 million copies of his books around the world, and The very hungry caterpillar has been translated into 47 languages!) Sweetpea LOVES this book with the holes where the caterpillar had eaten his way trhough all the food! So, since we are so keen on felt boards around here these days, I had great fun creating a Caterpillar-themed felt board set for her!


And a little more detail...

As I was browsing around on the official Eric Carle website , I found a page called The Caterpillar Exchange under the Resource section. This is a bulletin board where parents and teachers share ideas about how they have used Carle's books in teaching their children anything from sequencing to healthy eating habits! One EXCELLENT idea that I will definitely do with Sweetpea tomorrow, is to make an actual little caterpillar that the child can push through the holes in the pages as he 'eats' his way through all the food! The lady who sent in that idea actually sewed a little stuffed caterpillar, but we have the board book with smaller holes, so I am thinking of using a piece of green pipe cleaner.

This is definitely a book that deserves a spot on your child's bookshelf. You can purchase it by clicking on the link below!


                                                             The Very hungry Caterpillar

STOP PRESS: As I was writing this post, my friend Georgia from Love and Lollipops sent me an e-mail to tell me about the Caterpillar post she has just published on her blog!! Go check it out  - her boys used a craft set she bought from me to make two super-cute caterpillars. Well done, boys!

We are now reading The Grouchy Ladybug which I found at our library last week. The daddy also read it to Sweetpea over the weekend and now we all go around asking each other: "Want to fight? No, you're not big enough!!" all day!

Felt Board Fun

I love felt boards! The whole idea just brings back so many pleasant childhood memories of Sunday school classes where we sat, mouths agape, as we watched the teacher smooth her hands over the beautiful pictures of Bible characters as she told us the stories. My mother eventually bought us our own felt board and books with press-out pictures that had little strips of felt on the back, and I spent hours telling myself the story of Jesus' birth while organizing the pictures just so!  And isn't there just something almost 'organic' about handling pieces of felt?

So, about a week ago I made a lovely, lightweight felt board for Sweetpea's room, using a piece of tan coloured felt I had sitting in my fabric cupboard for ages! I sell felt boards from the Suczezz range of educational toys, but I'm a bit of a pain about matching decor, and since theirs come in blue or green, it would clash with the creams and dusty pinks of her bedroom... Some of their felt board themes came in handy, though! As soon as the felt board was done, I gave Sweetpea the SHAPES pack to try out - it was an instant hit!

About half of the shapes from the SHAPES theme pack, here on the green Suczezz felt board.

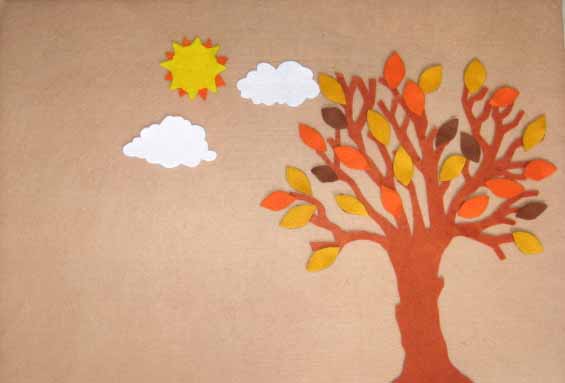
But what had inspired me to make the felt board in the first place, was the WEATHER & DATES theme I had bought her a while ago. Since she's not reading yet, I thought I'd keep it in the cupboard for another year or so, but it did give me the idea to make a weather board using pictures. With the milder autumn days bringing a bit of a nip to the air around evening time, we've been talking a lot about winter clothes and summer clothes, and observing the weather every morning before choosing an outfit. So I took the clouds and rain pictures out of the pack, made a more cheery sun and had a ton of fun cutting out a tree onto which Sweetpea can stick leaves according to the season.  I've added the rest of the WEATHER & DATES theme to this picture so you can see what it looks like .


I was having way too much fun to quit then, so I visited http://www.makingfriends.com/ for some templates to make a boy and girl to play under the tree! My friend Georgia over at Love and Lollipops recently posted on this great website, where you can download free paper dolls, as well as clothes, hairstyles, and accessories for your dolls!  I made a felt version in no time and will now be adding to the wardrobes so Sweetpea can dress her dolls according to the weather!

The tree in it's autumn outfit!

To see the rest of the felt board themes in the Suczezz range, visit the online catalogue by clicking here and here. If you would like to order any of the themes, or the felt boards, please e-mail me! And if you are feeling inspired and want to make your own felt pieces, you can now also order your felt from me!

LinkWithin

Related Posts with Thumbnails